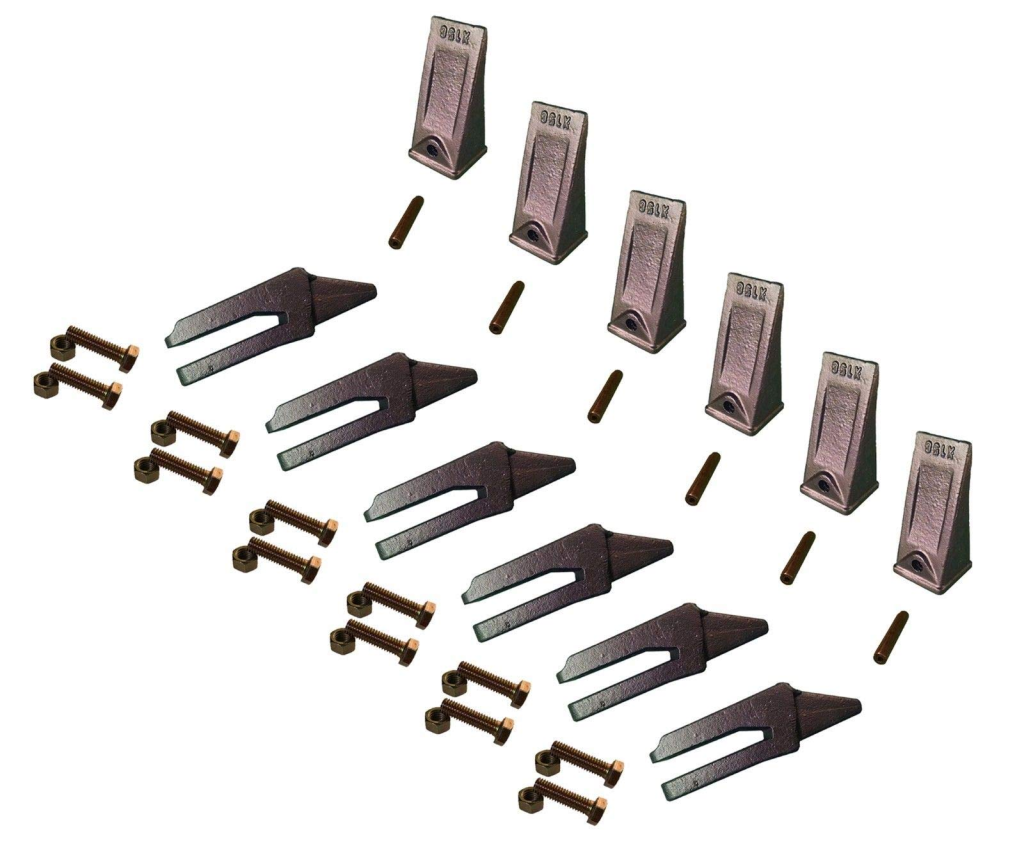
bolt on excavator bucket teeth
Excavator bucket teeth are essential components that enhance the digging efficiency of excavators. Bolt-on bucket teeth are particularly popular due to their ease of replacement and maintenance. This article will explore the features, benefits, and installation process of bolt-on excavator bucket teeth.
bolt on excavator bucket teeth
Features of Bolt-On Bucket Teeth
- Durability: Bolt-on bucket teeth are typically made from high-quality materials, such as hardened steel, which can withstand extreme wear and tear during excavation tasks.
- Versatility: These teeth are available in various shapes and sizes, allowing them to be customized for different types of excavation work, including digging, trenching, and grading.
- Interchangeability: Bolt-on designs allow for easy swapping of teeth, making it convenient to switch between different styles depending on the job requirements.
Benefits of Bolt-On Bucket Teeth
- Ease of Replacement: One of the most significant advantages of bolt-on teeth is that they can be replaced without removing the entire bucket. This saves time and labor costs.
- Reduced Downtime: With quick and easy replacements, downtime is minimized, allowing for more efficient project completion.
- Cost-Effective: By replacing only the worn teeth instead of the entire bucket, operators can save money and extend the life of the bucket.
- Improved Performance: Fresh, sharp teeth enhance the digging efficiency, making excavation tasks quicker and more effective.
Installation Process
Replacing bolt-on excavator bucket teeth is a straightforward process. Follow these steps to ensure proper installation:
1. Gather the Necessary Tools
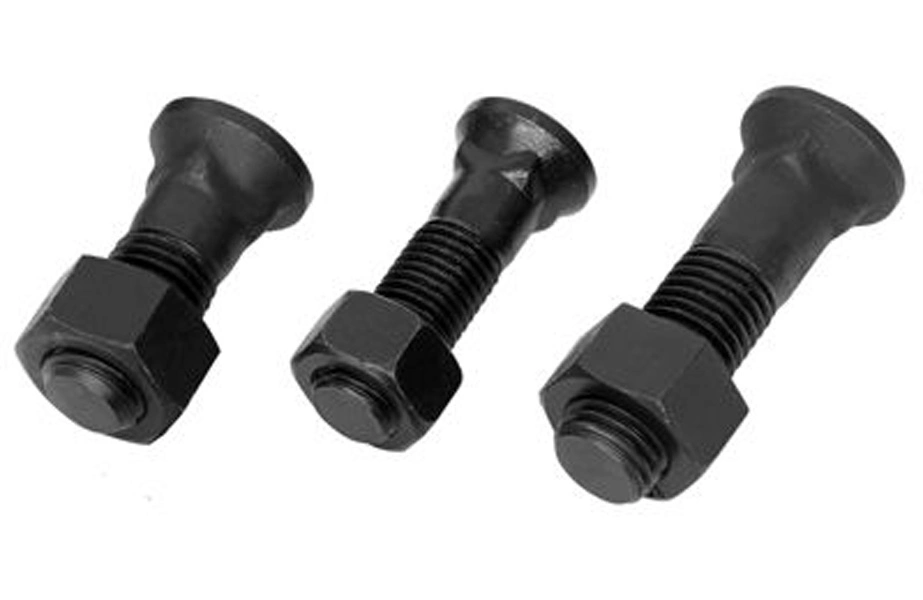
- Wrenches (appropriate sizes for the bolts)
- Socket set
- Hammer (if needed for stubborn bolts)
- Safety gloves and glasses
2. Remove the Old Teeth
- Lift the bucket: Position the excavator bucket securely on a flat surface.
- Locate the bolts: Identify the bolts securing the old bucket teeth.
- Unscrew the bolts: Use the wrench or socket set to remove the bolts. If any bolts are stuck, gently tap them with a hammer.
- Take off the old teeth: Once the bolts are removed, carefully pull off the worn teeth.
3. Install the New Teeth
- Position the new teeth: Align the new bolt-on teeth with the corresponding holes on the bucket.
- Insert the bolts: Place bolts through the holes and tighten them securely using the wrench.
- Check for tightness: Ensure all bolts are tight and the teeth are securely attached to the bucket.
4. Final Inspection
- Inspect the installation: Double-check that all teeth are installed correctly and securely.
- Test the bucket: Operate the excavator to ensure the newly installed teeth function properly during digging.
Conclusion
Bolt-on excavator bucket teeth are a practical choice for operators looking to enhance their excavation efficiency while minimizing maintenance time and costs. By understanding their features, benefits, and installation process, you can make informed decisions about your excavator’s performance. Regularly replacing worn teeth will ensure your excavator remains effective and productive on the job site.