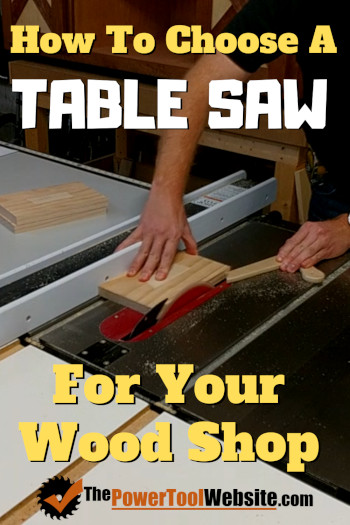
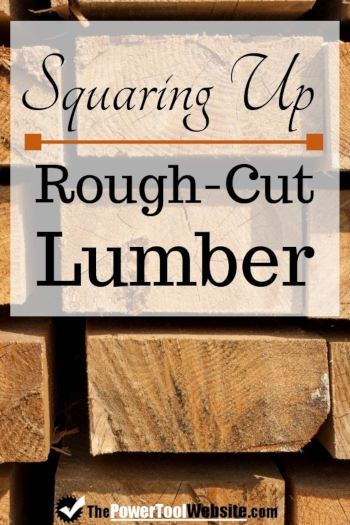
Squaring Up Rough Cut Lumber – The Power Tool Website
We’re talking about flattening, milling, straightening, ripping, truing, paralleling, etc… All of this is used interchangebly when desribing the process that can be summed up as “Squaring Up Rough Cut Lumber”.
It’s everything you do before the glue ups, before the sanding, before the finishing.
It’s the Prep Work that you just gotta do. And if you get this right, your completed project will thank you for it.
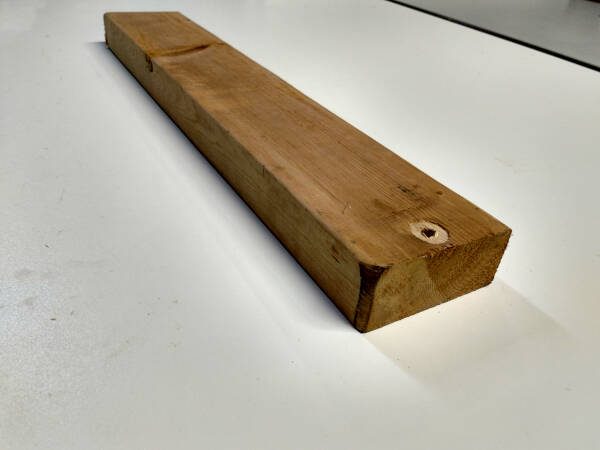
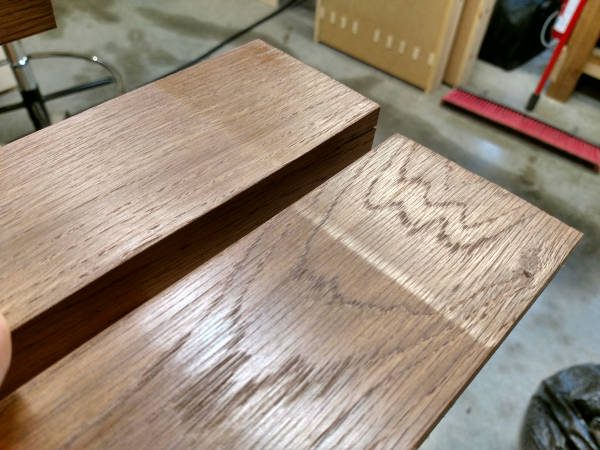
I’ll walk you through the process using this pine 2×4. Here’s before the squaring process:
And here’s after:

You’re about to get a beginners understanding of what this prep work looks like, and what tools are used.
Note: If you don’t have a jointer or thickness planer yet, you can still get square boards using your table saw > click here to learn how.
Squaring Up Rough Cut Lumber – The Proper Way

THE PROCESS (IN ORDER):
- Flatten one face of a board on the jointer
- Plane the other face parallel and to final thickness with the planer
- Flatten one edge of the board on the jointer
- Rip cut the other edge parallel and to final width with the table saw
- Cross cut one end square with the miter saw or table saw
- Cross cut the other end square and to final length with the miter or table saw
Following these steps in order will result in a very square and project-ready board.
But I know this may not be possible for you, as you may not have all the tools for the process.
Don’t worry, I’m right there with you. While I technically do have a jointer, it’s a small benchtop jointer and doesn’t handle much, and I basically don’t use it.
So I’ve found ways to get the job done in a small wood shop, using alternative methods I’ll show you on this page.
Below I will break down each step, explain my alternative methods and common pitfalls, and even some work-arounds.
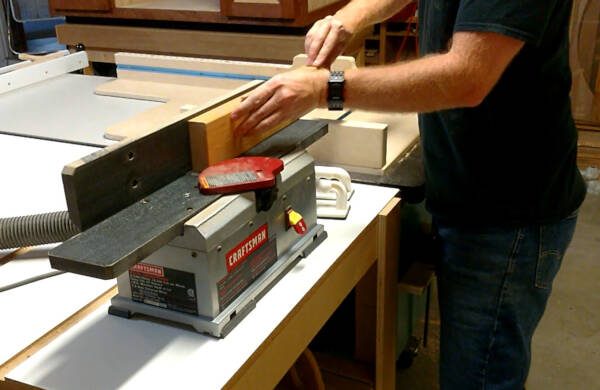
Step 1 – Flatten One Face With The Jointer
Squaring up rough cut lumber starts with making one face of the board perfectly flat.
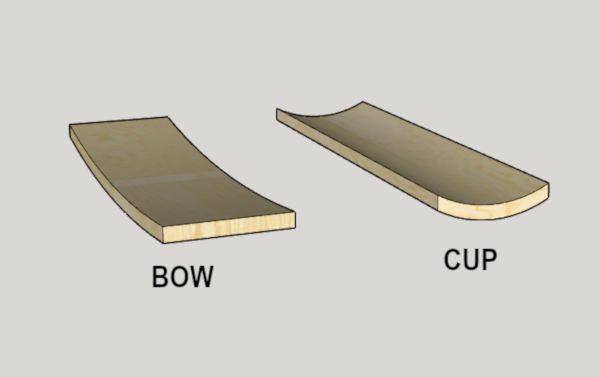
Rough lumber may not be flat right from the lumber yard.
The board may have a bow or a cup, or a combination of both. It also may not have parallel faces and edges.
Using rubber-faced push blocks, push the board through the jointer with one face down against the cutter head:
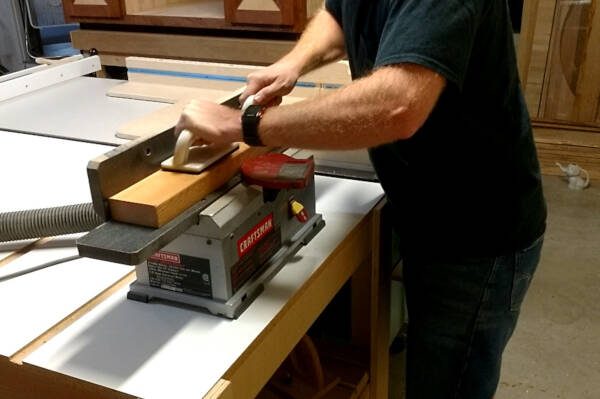
Keep downward pressure on the board (the best you can) on the infeed and the outfeed side of the cutter as you go.
It may take several passes to flatten it out completely. Removing about 1/16″ or less with each pass works just fine.
If the board is cupped, you’ll want to run it through with the concave surface down, so the board won’t rock side to side as you push it through.
If the board is bowed, do the same thing (concave surface down). This can be tricky with longer boards. The longer the jointer table is, the better it will handle bowed boards.
It may be necessary to crosscut the board closer to its final length (plus about 5″ extra), to get a bowed board flattened on your jointer.
What if your jointer is not wide enough for the width of the board?
If your project allows for it, rip the board down narrow enough so it will work with your jointer.
If the project requires wider boards, one option then would be to square up narrower boards and edge-glue them together to make the wider board needed for the project (after you’ve squared up the edges).
If that’s not an option, read the following suggestions.
What if you don’t have a jointer?
If you can’t use a jointer for step 1 because you don’t have one or your board is too wide, you can usually get by with a planer.
The thickness planer will smoothen the face of the board, and it can also flatten a cupped board.
It will take several passes through the planer, and depending on the hardness of the wood your planing, you may only be able to plane between 1/64″ to 1/16″ with each pass.
NOTE – A planer by itself will NOT flatten a bowed board. See How To Flatten A Bowed Board With A Planer at the end of this article.
Another option is to buy your boards with as flat of a surface as possible to start with.
Sometimes that means spending more on wood, but you can buy planed flat boards from stores like Lowes and Menards.
These will already be squared up and you can skip the jointing process altogether.
Step 2 – Plane Other Face Parallel
Squaring up rough cut lumber requires the 2 faces of the board to be parallel with one another.
Using your thickness planer, run the board with the flattened face down, through the planer.
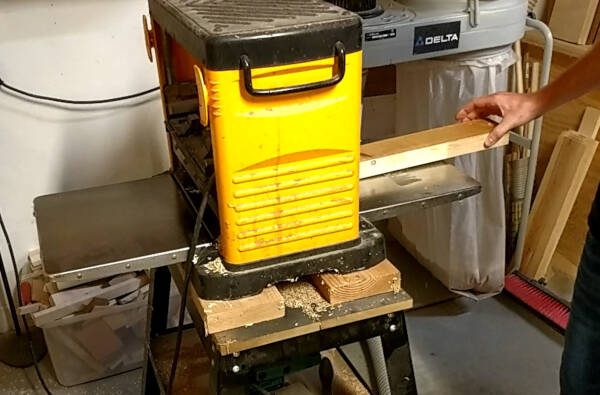
This accomplishes 2 things, it makes the faces parallel, and it finalizes the thickness of the board.
You’ll make multiple passes, and depending on the hardness, you should be able to plane away 1/64″ to 1/16″ of an inch with each pass.
With soft wood like pine, you may be able to remove a bit more than that.
Dealing with Snipe
Snipe is a common problem with planing boards through a thickness planer. This is when the board is only underneath 1 of the 2 rollers, and the weight of the board pushes the end up into the cutters to much.
Here you can clearly see the snipe in these boards after they’ve already been sanded and stained:
This only happens at the ends of the board. You likely will have about a 2″ section at each end that will have snipe, and so it’s a good idea to leave the board at least 4″ to 5″ longer than you’ll need in the end, so you can cut away the sniped sections.
Click here to see a good diagram illustrating how snipe happens.
If you’re planing smaller boards, it can be helpful to feed one after another, pushing the leading end of one board into the trailing end of the preceding board.
This helps reduce (or eliminates completely) snipe on both boards where they were pushed together.
PLANING TIP – During the squaring process, flatten the boards but leave them thicker than the final requirements. Then once the boards are ripped and cut down to smaller sizes, pass them all through the planer at the same time until their thickness is all uniform.
What if you don’t have a planer?
Your options become a bit more limited if you don’t have access to a planer.
If you’re building rustic furniture, you can usually get by with less-refined boards.
But if that’s not an option, you may have to spend more on lumber and get boards that are pre-planed and already flat from the store.
Another option is to use your router and a special sled…
How To Flatten Any Board With A Router
In this video you’ll see me using a very simple and effective method for flattening an entire board face using a router.
Once you build a sled like this, it can be used for really any board, not just large slabs.
The concept is universal and can be applied to flattening regular stock, even if requiring a few modifications to your sled or your work bench.
Plans for this jig, as well as an instructional build-tutorial video, can be purchased here.
Step 3 – Flatten One Edge With The Jointer
Squaring up rough cut lumber requires producing a square and flat edge.
Now run your board through the jointer again, this time standing on its edge.
The pressure you apply to the board will be holding the board against the fence, as well as down firmly to the jointer table.
This not only makes the edge square to the face of the board, it also flattens the edge.
What if you don’t have a jointer?
I personally use my own small-shop techniques to flatten the edges of a board with my table saw.
And before the rough cut lumber is squared up, the edges are likely not ready for the table saw rip fence.
It can be unsafe (or cause burning) if you run a board through a rip-cut and the edge against the fence is not flat.
So how can you safely prep a board that is crooked, or has 2 rough edges, without a jointer, and without using your table saw rip fence?
You’ve got 2 options here:
- A table saw “jointer sled“
- A router
You can use your table saw with the appropriate sled to put one flat edge (safely) on a rough-cut or crooked board.
It’s called a jointer sled, or a straight-edge sled.

Using this sled, you’ll clamp the board in place, and the sled utilizes the table saw miter slot to push the board straight through the cut.
This way, it does not need to reference the fence at all, which you wouldn’t want with a rough or crooked board.
Click Here to see how to use a jointer sled
Or the other option being the router.
For this you’ll need a straight edge at least as long as the board you’re flattening.
You’ll also need either a flush-trim router bit, or a straight cut bit and a guide bushing.
By clamping the straight edge to the board, you’ll be able to run the router along the straight edge and put a flat, square edge on the work piece.
Click Here to learn how to use a router as a jointer.
Step 4 – Make Other Edge Parallel With Table Saw
To square up rough cut lumber, you must make the edges parallel to one another.
To do this, you’ll cut the board to it’s final width using the table saw.
Just run the flattened edge along the table saw’s rip fence.
This will square up the other edge, and make the edges parallel.
OPTIONAL: If your table saw cuts nice and square and leaves a clean finish (by having the correct, and sharp blade), then you may not need any more edge-jointing. But if you’re building a panel, especially for a “Fine Furniture” project, you’ll probably prefer to use a jointer on both edges right before the glue up. This will ensure crisp, clean, flat, squared edges on each side of each board in the glue up.
Related > Table Saw Blades Explained
What if you don’t have a table saw?
Your options become incredibly limited if you don’t yet have a table saw for your wood shop.
Your projects will be limited to using the stock you can buy from a lumber yard as is.
Again, this may mean you spend more on wood, as you’ll be buying pre flattened boards.
These boards also come with jointed edges, and are sold at various widths and lengths.
I suggest going to your local lumber store and taking pictures of all the boards they carry.
Come home and make a list of the various widths and lengths they have, then design your projects around these boards.
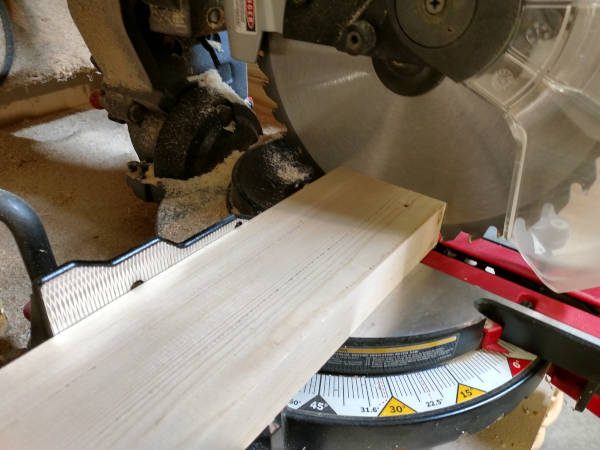
Step 5 – Cross Cut One End Square
Squaring up rough cut lumber requires a square end from which to measure for final length.
Using your miter saw, cross cut the board at one end to produce a square flat end.
ALTERNATIVES
If you have a decent table saw, you can skip the miter saw altogether in most cases.
Your table saw can easily handle cross cuts.
In fact, I mostly do all my cross cutting on my table saw.
The only time I use my miter saw is for a quick rough cut when I’m breaking down long boards right from the lumber yard.
With the table saw you’ll have 2 options for crosscutting.
- Miter Gauge
- Crosscut Table Saw Sled
With the miter gauge that came with your table saw, you can safely and easily make cross cuts.
You’ll want to tune the miter gauge to make it accurate, but once it’s set up, it should be quick and simple to repeat accurate 90 degree cuts.
If done properly, you can safely make repeated cuts using a stop block. In the following link, you’ll find a video showing how to do this:
Click Here to see how to use your table saw miter gauge.
The table saw sled is really where it’s all at though, in my opinion.
With a good table saw sled, you’ll be able to make precision crosscuts very easily.
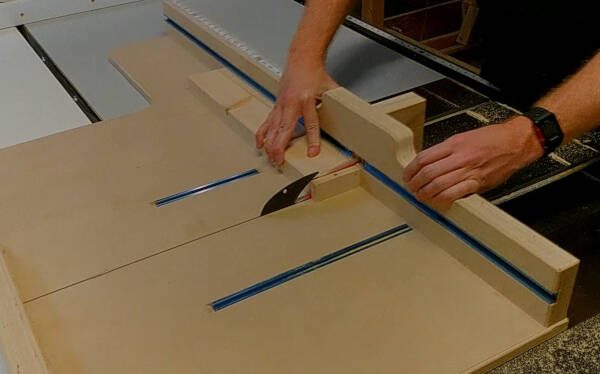
Not only that, but a good table saw sled incorporates a stop-block for duplicating cuts, clamps, 45 degree miter support, and even advanced joinery attachments like for dovetails.
Click Here to see how to use a premium Table Saw Sled.
Step 6 – Cut Board to Final Length
The final step for squaring up rough cut lumber is to make the second end of the board square, at the desired length for that board.
This is like step 5, only now you’ll measure from the square end and make your final crosscut.
CROSS CUTTING TIP – If you are cutting multiple boards the same length from a single flattened board, first create the square end, then set up a stop block, and make the remaining final crosscuts all at one time using the stop block so they’re identical.
How To Flatten A Bowed Board With A Planer
Remember, you cannot flatten a board with a bow in it using just the planer. If the board is shaped like a banana going in, it will be shaped like a banana coming out.
So we use a sled in combination with the planer to get the job done.
Here is a simple planing sled you can make to flatten a board that has a bow in it. This can also work on boards that have a slight twist.
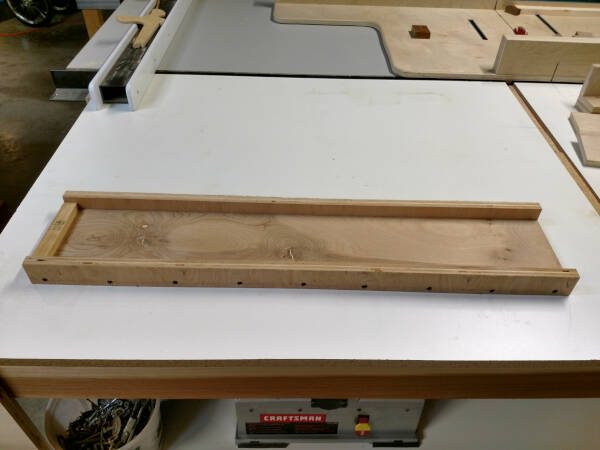
It’s made with flat plywood. The 2 edges are added to keep the sled flat and straight. These sides cannot protrude higher than the board in the sled will be.
Also glue a strip at the front, this will allow the work piece to push against that end and keep the sled moving.
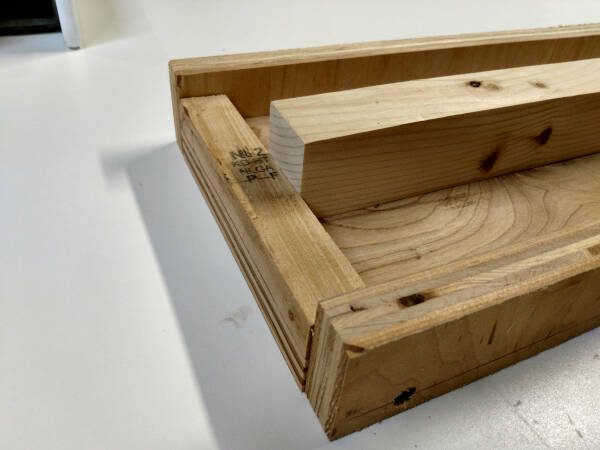
It’s important to understand, the rollers pushing the work piece through the planer are on the top, so the forward force through the cutters is on the work piece, not on the sled.
That is why you don’t need a block at the back end of the sled, but rather the front.
Place the board in the sled with the leading edge tight at the front.
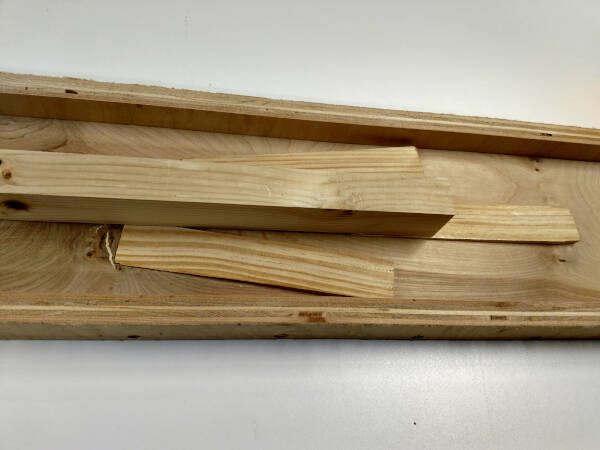
I’m using this scrap piece of pine to illustrate the process. It has a bow as you can see here when I push down on one end:
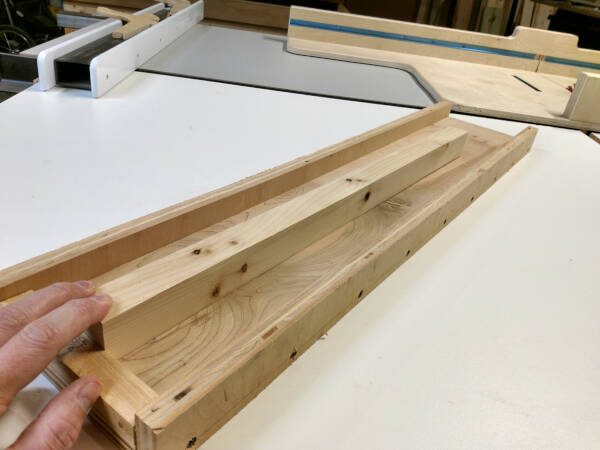

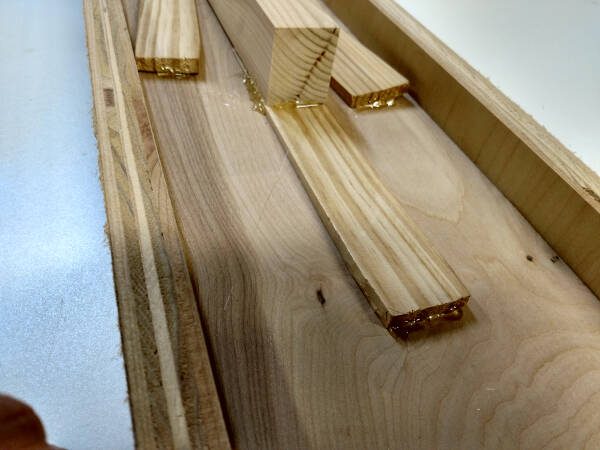
Shim under the board wherever there are high spots. Add enough shims so the board doesn’t rock in any direction and the gaps are well supported.
To make sure none of the shims shift while planing, use a hot glue gun to temporarily glue everything in place. Just a little at each shim will do it, and a couple spots where the board touches the sled.
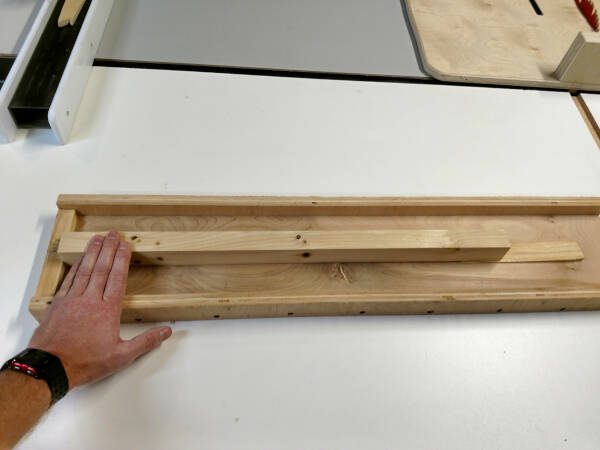
Now run it through the planer multiple times, until the top surface is flat.
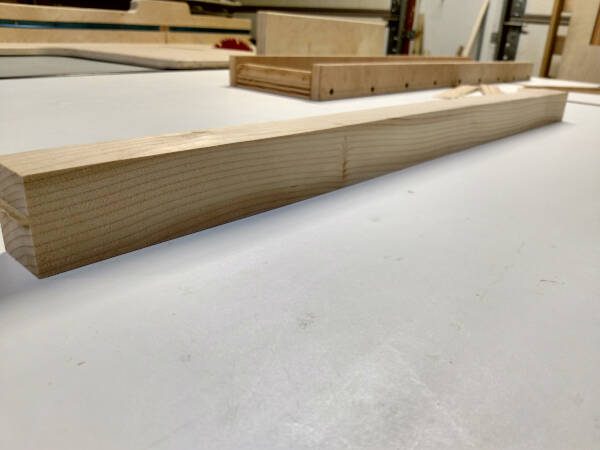
Here I’ve removed the work piece after planing and flipped the board over. You can see it is now perfectly flat against my work bench – no more bow.
Next, you can plane the opposite face, no longer requiring the sled.
Now that you understand the process of squaring up rough cut lumber, your options for buying lumber and projects in general are much broader.
Be sure to subscribe below for updates on articles like this, free plans, and projects sent straight to your inbox.
Next:
How To Handle And Break Down Plywood
5 Tips For Improving Woodworking Accuracy