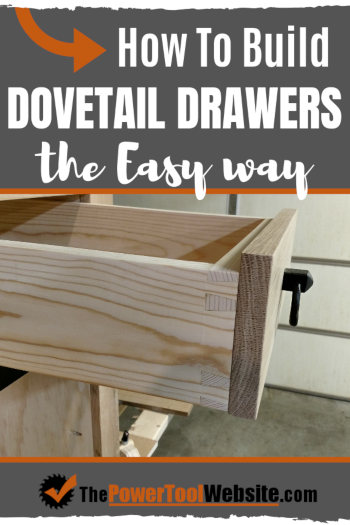
How To Build Dovetail Drawers The Easy Way – The Power Tool Website
In this part of the Kitchen Island Tutorial, I’m going to show you (with lots of pictures) how to build dovetail drawers the easy way.
I say the “easy way” because the process I use is beginner friendly.
You don’t need years of experience, however you will need a table saw jig for cutting your dovetails.
If you haven’t made a dovetailing jig yet, check out this table saw sled, and this dovetailing attachment that fits it.
Cleanup of the dovetail pins and tails can be done with a scroll saw or band saw. If you don’t have one of these you can also use sharp chisels.
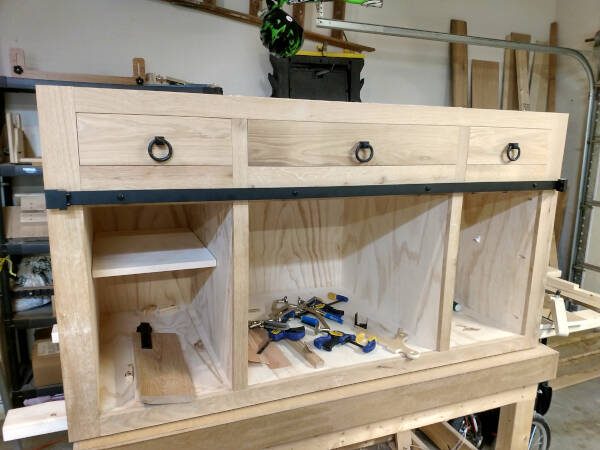
Here are the drawers finalized before a finish is applied. As you’ll see, I build the boxes with pine, and attach an oak drawer face.
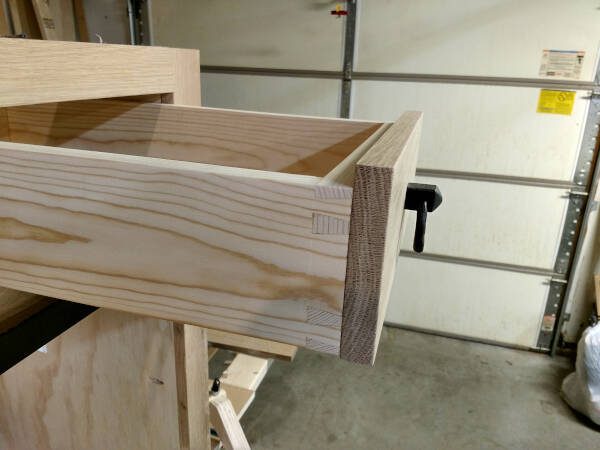
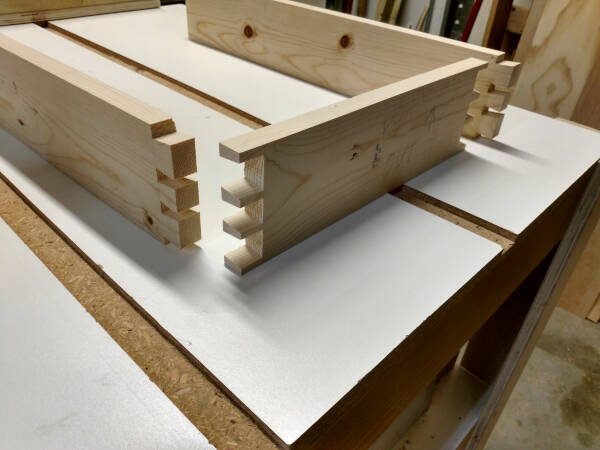
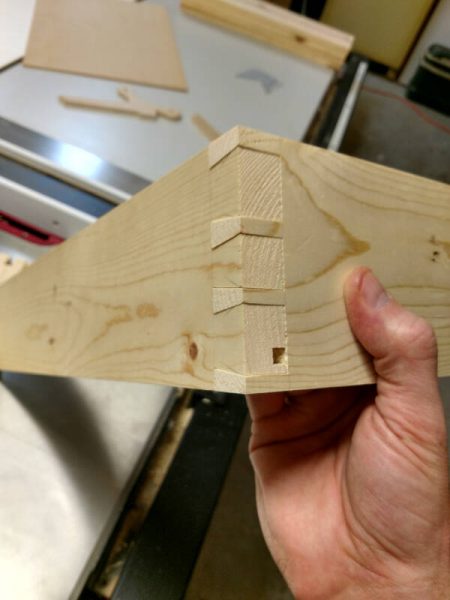
Here is the drawer box itself, before the drawer face is attached. This is the exact box I’ll be teaching you how to build below.
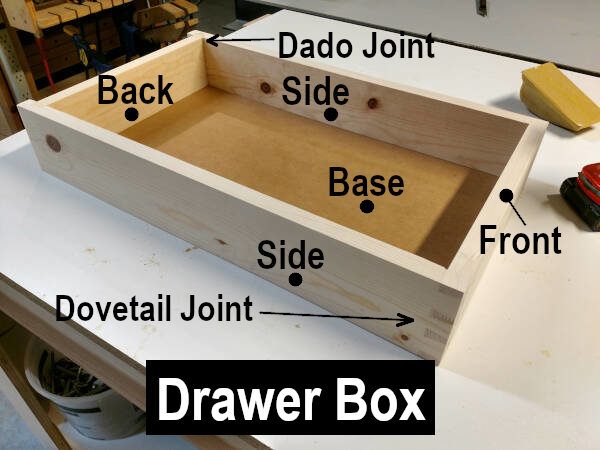
As you can see, the front corner joints are dovetails, and for the back 2 joints of the box, you’ll use dado joinery.
The face of the drawer will be attached to the front of the drawer box.
Step 1 – Cut Front and Sides
The front board of the box will be the entire width of the drawer. I suggest making the width of your drawers 1/8″ narrower than the drawer opening in your cabinet.
NOTE – If you’re using store-bought drawer slides, you’ll follow the included instructions to determine how wide to make the drawer, relative to the cabinet opening.
The drawer-box sides will be the length of the drawer (minus the thickness of the drawer face), and the drawer-box back will be cut to length after the dovetails and dados are cut.
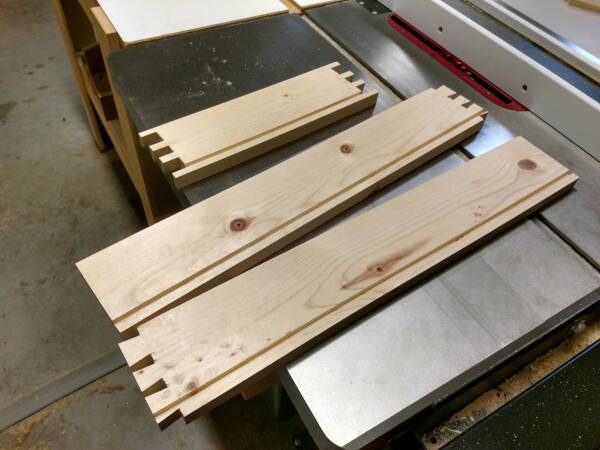
So go ahead and cut the front of the dovetail drawer box, and the 2 sides.They will all be the same width, and the sides will each be the same length.
Make sure you’re final boards are nice and square, this is very important for any good joinery. Read: How To Square Up A Board With A Table Saw.

Step 2 – Cut The Dovetails
NOTE – This is part of a more complicated process that will be specific to your method of cutting dovetails. If you have the jig from Wood Shop Essentials, the plans include directions on marking tails, using the jig, transfering the lines, and cutting the tails and pins.
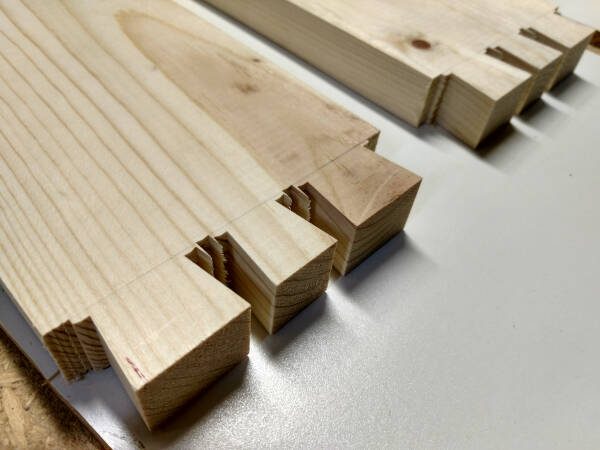
Now using your dovetailing jig and your table saw, cut the tails at the front end of each side board.
Watch this video to see me creating these dovetails.
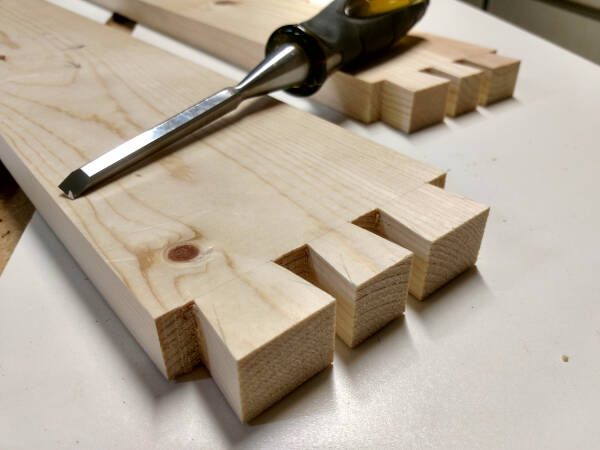
You can clean up the space between the tails with a chisel if you don’t have a scroll saw or band saw.
Once the tails are cut, you can transfer the lines to the front board for the pins, and cut them.
Now make sure everything fits together nice and tight, you may need to do a little work to the pins to make them fit the tails nicely.
Step 3 – Fitting The Base
How to build dovetail drawers with a floating base.
The base on this drawer is 1/4″ sheet material. Use plywood ideally, I’m using 1/4″ MDF I had laying around.
>> Learn all about MDF here
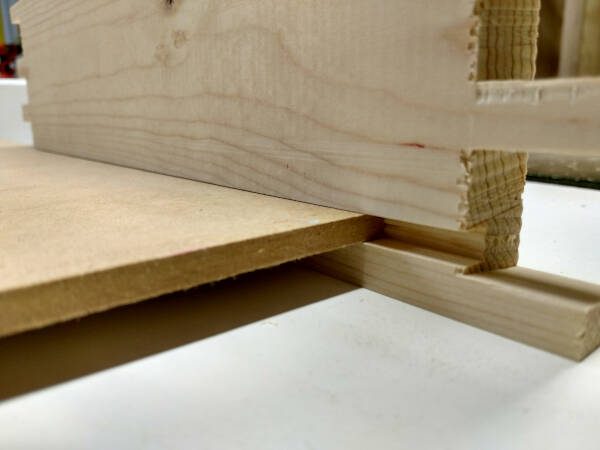
The sides and the front will have a 1/4″ groove cut near the bottom inside edge of each piece.
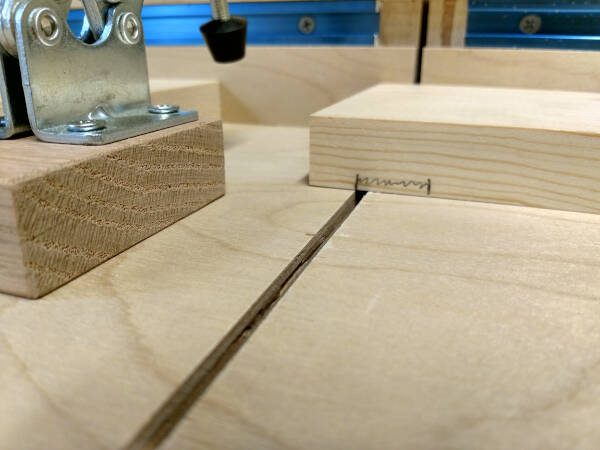
You’ll want to line up the groove so it’s above the thick part of the bottom half-pin of the drawer-front, like this:
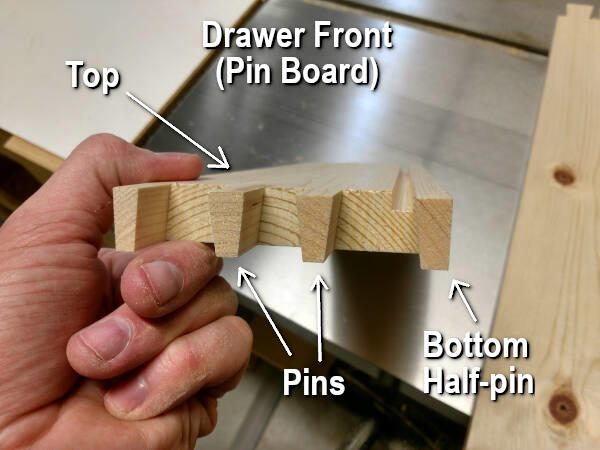
So using your pin board, set your fence and blade to make a 1/4″ deep groove cut at this location.
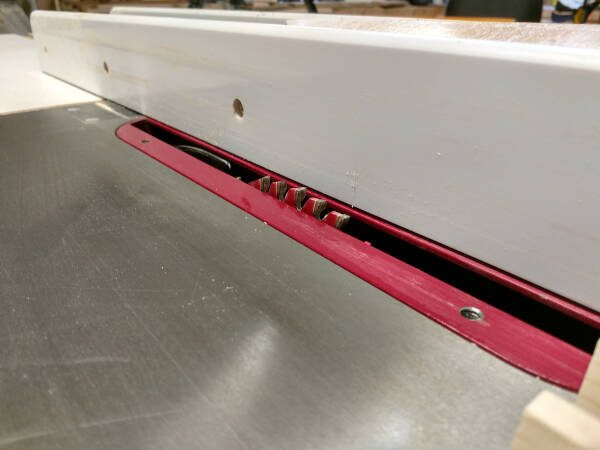
Now run each board (front and 2 sides) along to make the cut at the same fence setup. Then move the fence 1/16″ or so and cut them all again.
Keep doing it until the base your using fits into the groove:
Be sure you’re cutting the grooves on the INSIDE of each piece.
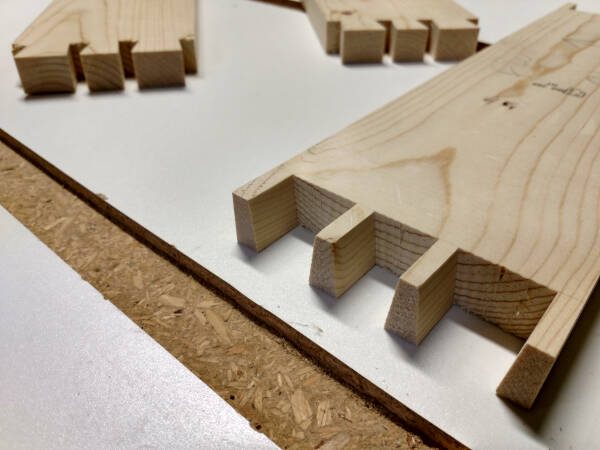
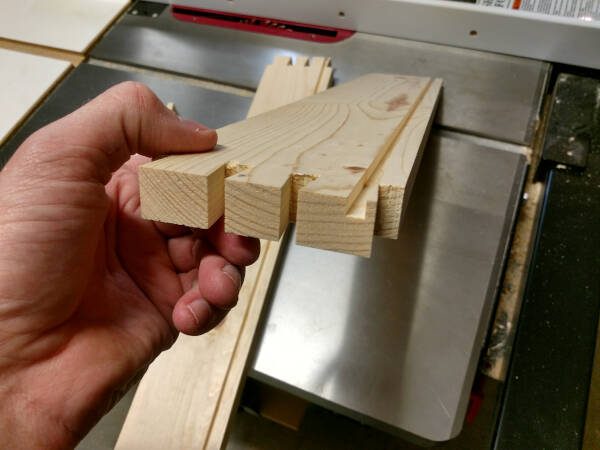
So at this point you should now have all the grooves cut – 1 groove the entire length of the board, in each of the 3 pieces (front and 2 sides):
What you’ll notice is that the groove runs right through the bottom tail of the side boards.
Don’t worry, this will not be seen once the drawer face is attached to the drawer box. As you can see, this is only exposed at the front of the box:
Step 4 – Create the Back
How to build dovetail drawers with dado joinery for the back.
The back of the drawer box does not need a groove, as it will sit on top of the drawer base, and the base will be screwed to the bottom of the back board.
Follow along and I’ll illustrate the entire process.
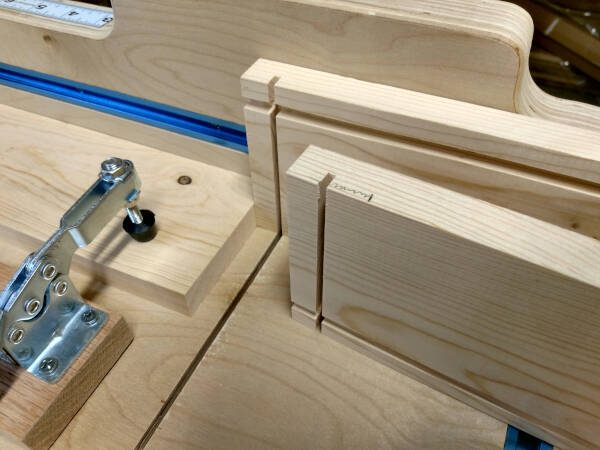
First you’ll want to cut the dados 1/2″ from the back, on the inside of each side board.
The dados should be at least 1/4″ deep.
Use your table saw sled and a stop block to make this simple, and to make both sides identical. Do this to make the 2 outside cuts on your dados, and make sure the dados match the thickness of the board you’ll use for the back.


Once both edges of the dados are cut, remove the stop block and cut away the remaining material within the dado by making multiple passes.

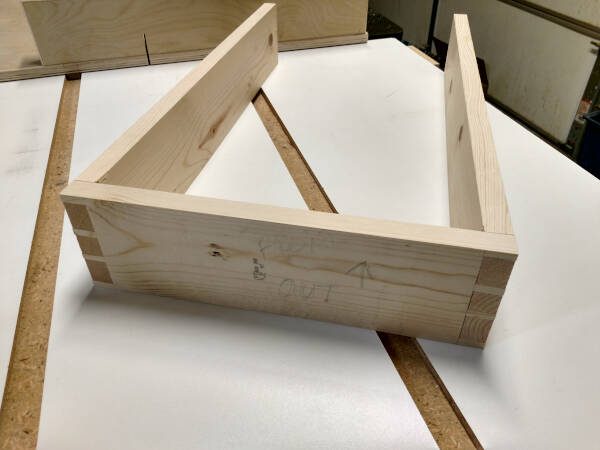
Now dry fit your other 3 pieces together and use a framing square to square up each side.
To confirm sqareness, you can measure the distance between the sides near the front and the back, they should match.

Now measure the distance between the 2 dados, this will be the length of the back board of the drawer box.


The bottom of the back should only go down to the top of the grooves cut for the base.
Step 5 – Glue Up
How to build dovetail drawers with a single glue-up.
Now you can glue the 4 pieces together.
When clamping the dovetail side, you can make some custom clamping blocks by cutting away sections of scrap blocks, so the clamping pressure is only on the tails:


The only clamping needed for the front of the drawer box is on the tails. At the back you’ll want a second clamp for the dado joints (see below).
Once clamped, use a framing square (or check measurement corner to corner), and use another clamp to pull the box square before the glue dries.

After the glue dries, you can sand the dovetail joints smooth. Use 80 grit until it’s flat, then finish with 120 grit.

Be sure to keep the front of the drawer box flat all the way across, so when you attach the drawer face, it will not have any gaps.
In other words, don’t just sand at the dovetails, sand the entire surface down evenly until the dovetails are flush.
Step 6 – The Base
How to build dovetail drawers with a semi-floating base.
Now measure the distance between the grooves at the back of the drawer box.

Subtract 1/16″ (or a bit more) from that measurement, and that’s how wide you’ll cut the drawer base.
Once cut, slide it into the grooves until it fits into the groove in the front board of the box.
Then mark a line at the back of the back board.

Cross cut the base to the line so the back of the base is flush with the back of the back board.
The base will not be glued in place. Just slide it all the way in and flip the box upside down.
Now predrill and sink 2 small wood screws through the base into the back:

And your drawer box is complete:

Finishing Up
Hardware will be attached through the box front and the drawer face, so you may need to counter bore a mounting hole from inside the box, so the mounting bolt will go completely through the drawer face.


Glue the drawer face to the drawer box once the drawer is installed in the cabinet and that way you can line the face up correctly while it’s being glued.
Use the drawer pull or knob to tighten the face into place, then pull the drawer out so you can clamp it.
I’ll cover these steps in another post, once I get further in this project tutorial.
- How to Build Base Cabinets For A Kitchen Island
- How to Build Shelves For A Kitchen Island
- How to Build Dovetail Drawers (you are here)
- Kitchen Island Trim For A Rustic Island
- How to Build Cabinet Doors
Be sure to sign up below to get updates on this project, free templates, plans, etc., directly to your inbox.