9 Wood-Shop Projects To Get Your Woodworking Hobby Off The Ground –
If there’s one thing most beginner woodworkers are missing, it’s the right tool for the job.
But that doesn’t always mean an expensive power tool. Sometimes it’s nothing more than a simple jig that can assist you in making the cutting or clamping process go easier.
So today, I want to show you 9 awesome wood shop projects that will help you with many different tasks in your wood shop.

1. Right Angle Clamping Jig
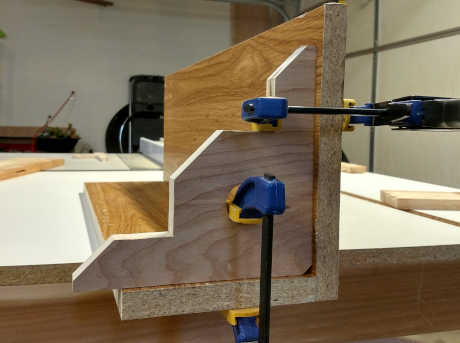
When you’re needing to glue or screw two boards together at a right angle, the clamping process can be tricky.
A good right angle clamping jig will help you line them up while you use a couple quick-clamps to secure each board to the jig.
It firmly holds them at a perfect 90 degrees while you finish out the task.
If you need a template for this clamping jig, I’ll send you one, just sign up at the bottom of this page.
2. Push Sticks and Push Shoes for your table saw
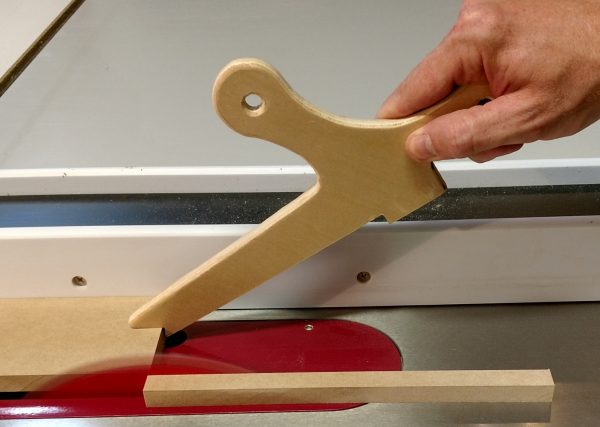
A push stick is used with your table saw to help feed the board through the cut, while keeping your hands away from the blade.
A push shoe is similar, but it provides more downward pressure along the top of the board. This is handy if the board you’re cutting is light and may tend to lift up while it’s being fed.
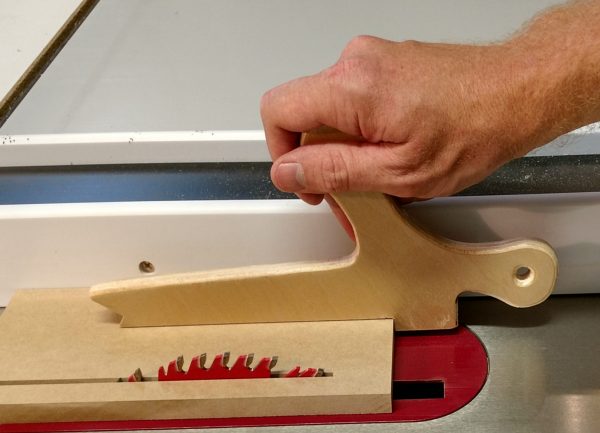
It’s best to have 2 of each. For any given cut, you may need one in each hand. Sometimes a push shoe will make more sense than a push stick, and vice versa.
So build yourself a good set of each and keep them reachable from your table saw infeed.
What I’ve got above is a Combo design I made myself, which you can get a template for if you subscribe below. Or jump ahead and sign up right now.
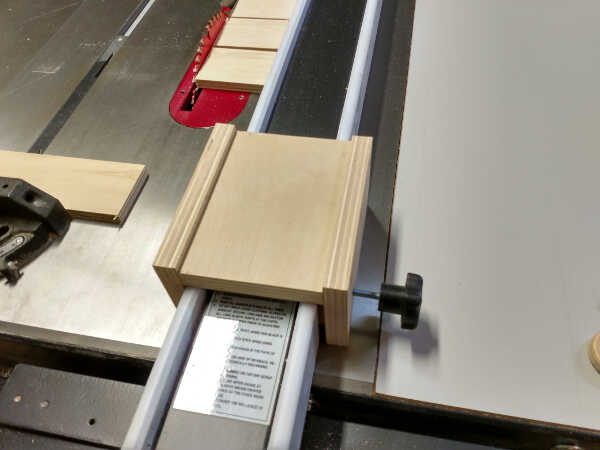
3. Stop Block for your table saw fence
If you’re making a single cross cut on your table saw using your miter gauge, you’ll probably just mark the cut, line it up with the blade, and cut the board.
NOTE – You Never do this with the end of the board riding along the fence. That can easily cause kick back. Move the fence away when using your miter gauge.
However, if you’re making multiple cross cuts and you need the boards to be the same length, you should NOT just mark each one and line each one up individually.
You should use what’s called a stop-block.
This can be a block of wood that secures to your fence and gives a reference point to push the cut-piece against.
You would mark the first cut, then holding it in place on the miter gauge, move the fence and stop block against the board.
Do this near the infeed edge of your table saw, not near the blade.
Now with it secured, each board can be pushed against the stop block and then each cut will be identical.
For more information on this process and other basic table saw techniques, read Table Saw 101.
4. Picture Frame Clamping Jig
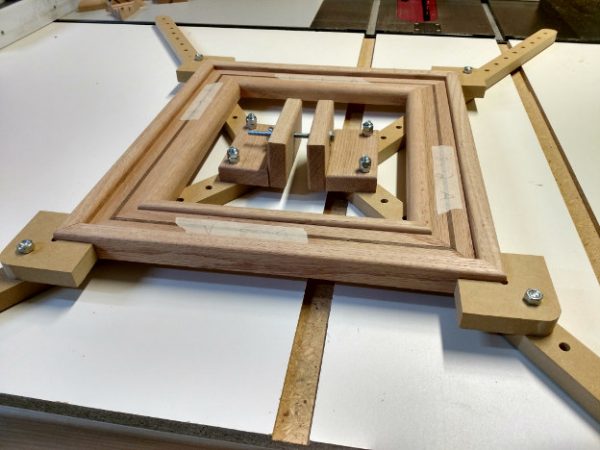
Picture frames are small enough you may find that clamping them together can be a hassle.
Specifically if you’re making miter-cornered picture frames.
So for this, you want a 4-way clamping jig that will apply equal pressure against all 4 corners at the same time.
This way you can apply the glue, line up the pieces, and have the entire frame glued together in one smooth step.
5. Table Saw Sled
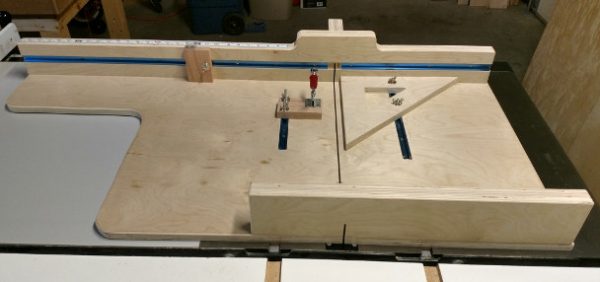
A good table saw sled is more than just a cross cut sled.
A well-designed sled will handle several different tasks, as well as provide you with a system for consistency, accuracy, and simplicity.
Ideally, your table saw sled will have a built in stop block system for repeating cross cuts, a way to handle small pieces safely, and the ability to add additional attachments as needed.
I would argue that this one project is the most important for most wood shops.
To see all the features of this sled, and to get ideas for your own, check out this demonstration video.
6. Miter Sled for your table saw
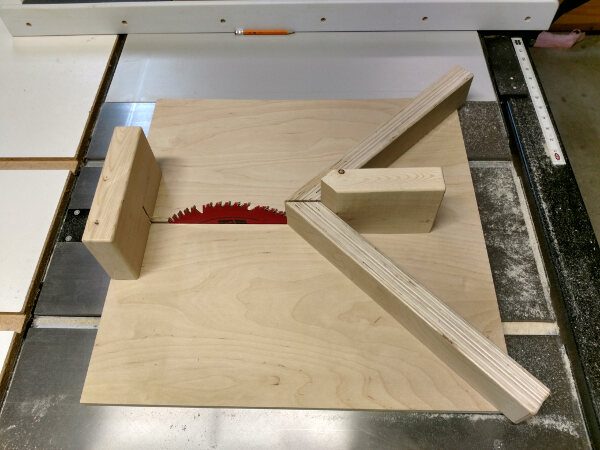
If you plan on making a lot of 45 degree cuts, you may benefit from a dedicated 45 degree miter sled.
This can be a very simple build and won’t take up much room in your shop.
The trick with these sleds is to line the edge (where it supports the work piece) with 120 grit sand paper. This keeps the work piece from sliding down the fence as you make the cut.
If you like the miter sled I have above, you can see it here.
7. Taper and Straight Edge Sled for your table saw
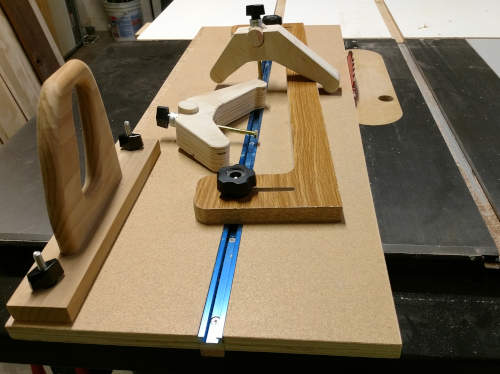
At times you’ll have a board that does not have a straight edge on it.
Maybe it’s a piece of scrap you’d like to use for something. Or maybe it’s a rough cut board with a partial live edge on it.
Or it could just be a crooked board.
If you don’t have a flat edge to run along the table saw fence for the cut, then you shouldn’t use the fence at all. It could be unsafe.
Instead, use a taper / jointer sled.
This clamps down on top of the board and secures it to the sled, making the cut-off hang over the edge.
Making tapers works the same way, and with the right kind of fence and clamps on your straight-edge sled, you can easily use it for making tapered legs.
8. Dovetailing Jig for your table saw sled
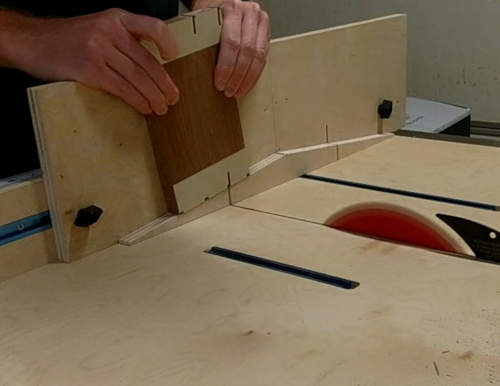
Making dovetails is a trademark skill for woodworkers. It’s kind of a big deal.
That’s why so many beginners are hesitant to try it. It’s intimidating. They usually feel it’s something that may come after years and years of experience and mastery.
But there’s a way you can use your table saw to create beautiful dovetail joints, and it makes them perfect every time.
There’s a little skill involved with lining up the cut and cleaning up the joint with some chisel work.
But the hard part done for you. And since it’s done using a jig, it does not require years of experience. It actually can be done by beginners, and it will look like it was done by a pro.
So when you build your sled, make sure it can take attachments (the right way).
And build yourself a dovetail attachment for it. You’ll be able to create amazing dovetail joinery in no time!
9. Mortising Jig for your router
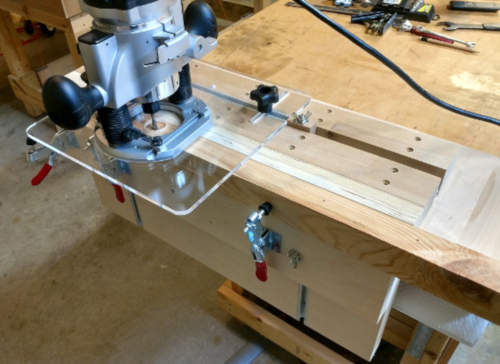
Similar to the dovetails, the mortise and tenon can also be intimidating.
That’s why it’s a good idea to build a jig that takes care of the hard part – the mortise.
If you have a router with a plunge base, you can build a simple jig that can create perfect mortises every time.
Then you’re just left with creating the tenon using your table saw.
Or, if you want to make it even easier, learn loose tenon joinery. This requires 2 matching tenons (easily done with the right jig), and then you create tenon stock from any kind of board.
The “Loose Tenon” slides into each matching mortise and creates a bond just as strong as the standard mortise and tenon.
With the right kind of mortising jig, you can create the mortises in the end of a board, which is required for loose tenon joinery.
Would you like to learn more about these jigs and techniques?
Sign up below, I’ll help you build your skills and learn what it takes to be a great Small-Shop Woodworker!