6 Reasons To Get This Leveling Tool – The Power Tool Website
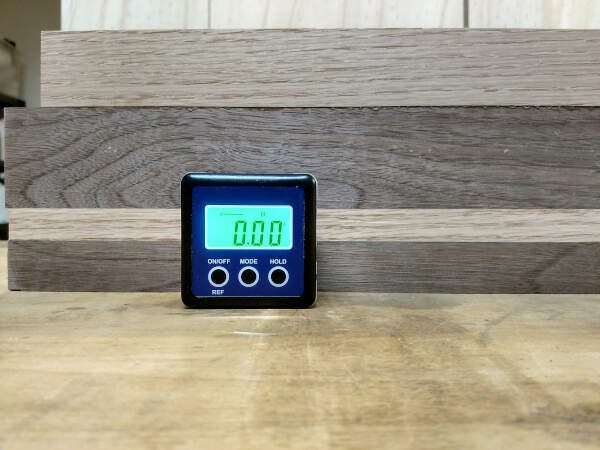
Do you have a digital magnetic level / angle finder? If so, have you also discovered how incredibly useful it can be, especially for a small-shop woodworker?

If you don’t have one, I want to show you why you should jump on Amazon and get one right now.
I haven’t had mine for that long, but I can tell you I’ve already found many ways it makes my life in the wood shop much easier.
If you haven’t bought one yet, you can go check out the one I got on Amazon here. It’s pretty cheap and so far has been working great.
But without any more hype, let me jump right into the 6 really cool ways you can use your digital magnetic level in your shop.
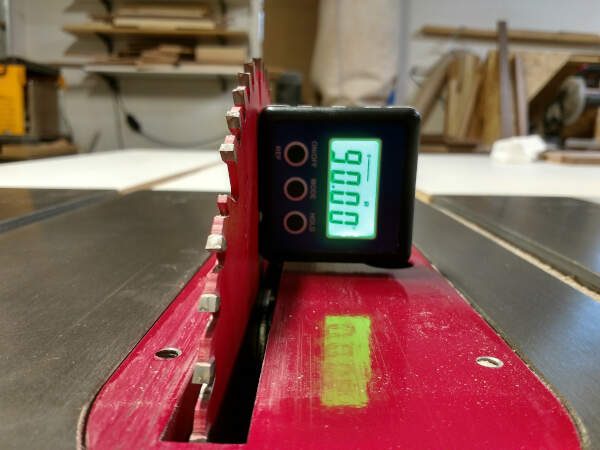
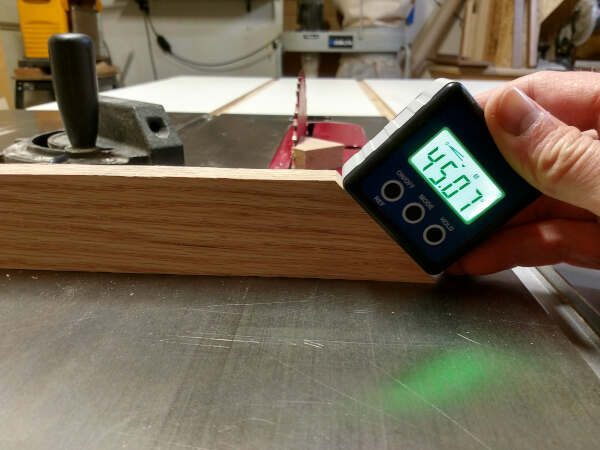
1 – Set Your Table Saw Bevel, & 90 Degrees
This one is the most obvious, but still super-helpful, so I can’t skip over it.
There are going to be times you need to adjust your table saw’s bevel angle. Usually that’s 45 degrees, but depending on what the project calls for, it can be anything.
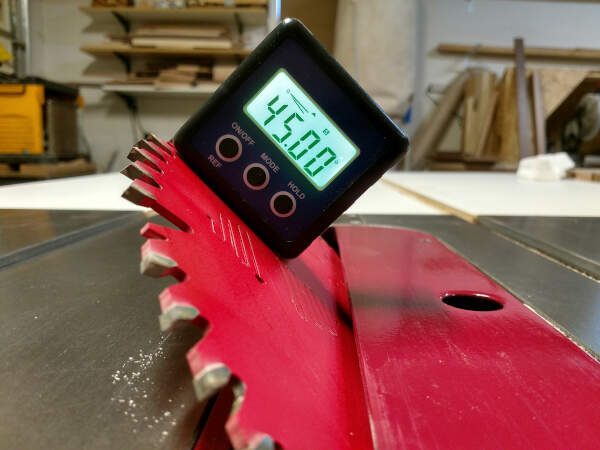
The magnetic angle finder hangs on your blade and tells you EXACTLY what angle it’s at.
However this is not only for finding the right bevel angle. It’s also great for making sure your blade is at a perfect 90 degrees for normal cuts.
The trick for this to be accurate, and this applies to everything on this page, is to be sure you use the ‘reference’ function.
This means you basically set the 0 degree to a reference surface you’re comparing to.
So in this case, you’ll set the level on your table saw surface. When you first do it, you may find your table saw is not exactly level.
That’s ok, but that means your blade won’t be a perfect 90 even if it is set up to cut a perfect right angle.
You want set the reference surface on the table saw, so that is your new 0 degrees.
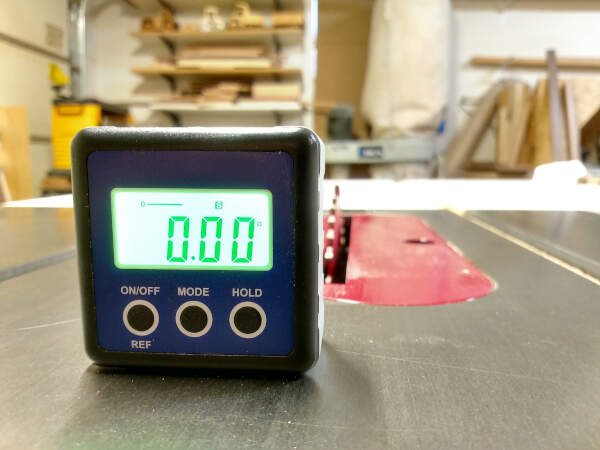
Then put it on the blade and check for 90, or whatever bevel angle you’re needing.
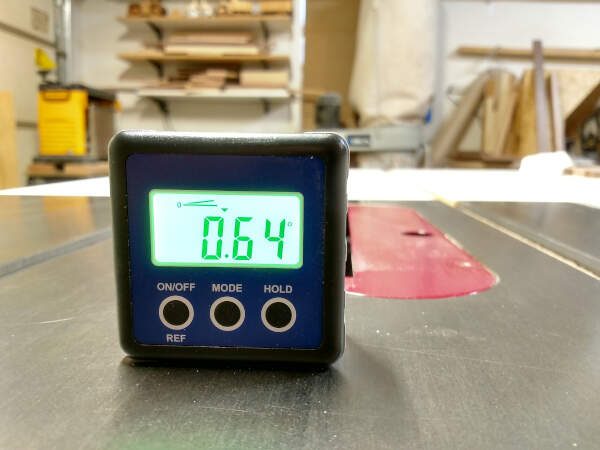
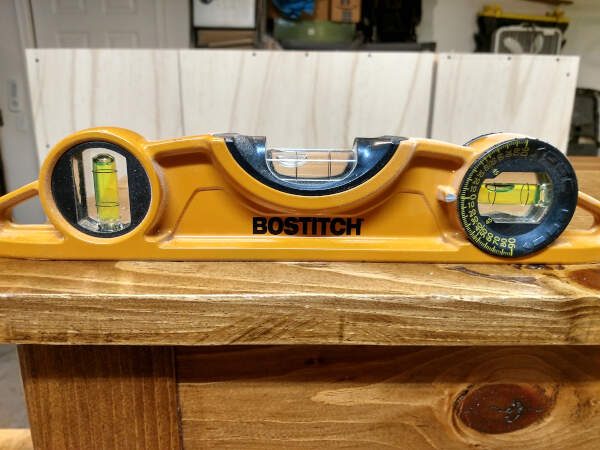
2 – Check Your Project for Level
I’ve found that depending on what area of my wood shop I’m working in, something being “level” does not always mean the same thing.
What can I say, my wood shop is my garage, and garage floors just don’t get poured that level for some reason…
This means neither my assembly table, or my work bench are perfectly level.
It also means it’s not real helpful to put a standard level on top of my project to check it for level, if it’s sitting on my work bench.
Here’s a small table I built a couple years ago to illustrate. It’s on my work bench and this torpedo level is showing how far it’s off from level:
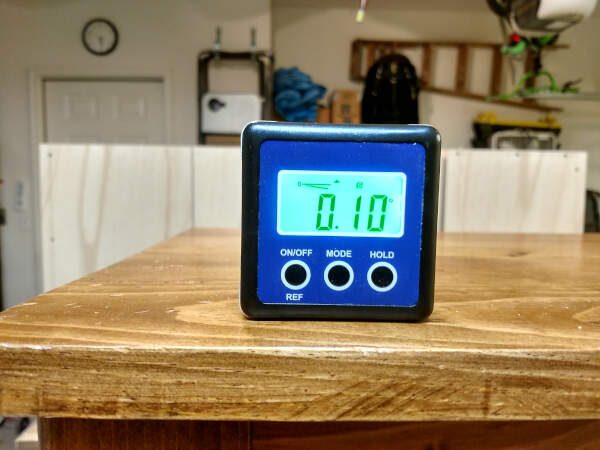
So with this handy-dandy digital level, I can set the ‘reference’ angle to the surface of the work bench. Then I move the level to the top of the project and check that it’s still at 0.
While this particular project is not perfect, it comes in real close, at 0.1 degrees:
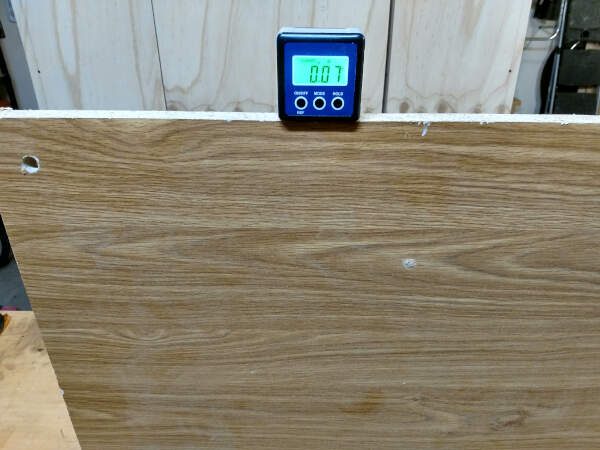
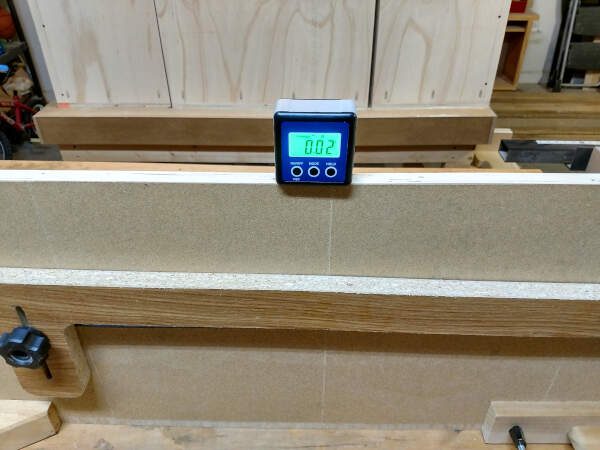
3 – Check A Board For Parallel and Square
Similar to the previous technique, this one involves checking a board or a panel.
You can use your digital level / angle finder to confirm a board is parallel on opposite edges.
Above, I set the reference surface to the work bench.
Then I check the other side of the board I’m working on. This one’s nearly perfect at 0.02 degrees.

Similarly, you can check opposite sides of a panel to confirm that it’s square.
This is a large piece of shelving material I had cut awhile back. It’s been sitting on the rack for probably a year so it’s a bit chipped up and dusty.
But regardless, at one time, it was supposed to be a perfect rectangle.
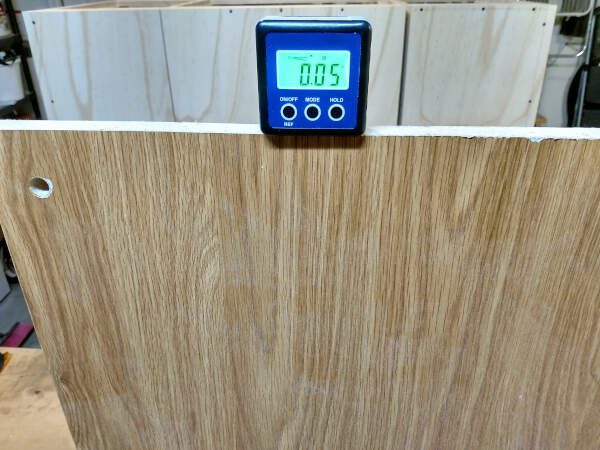
As you can see, I’ve checked it for level in both directions and it’s really close. One side is 0.07, the adjacent side is 0.05.
If all sides are level, the panel is square (or squarely rectangle…).
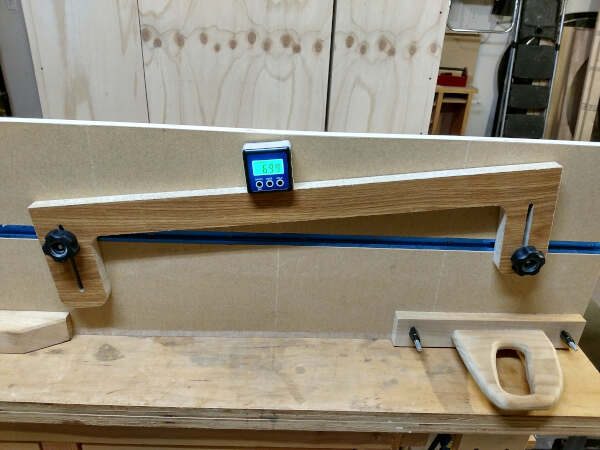
4 – Set Up Your Miter Gauge or Miter Saw
When you’re setting up your miter saw or your table saw’s miter gauge for a 45 degree cut (or any angle for that matter), you can use your digital level / angle finder to tune it in.
First, use a scrap piece of wood that has a good straight edge on it. Then make your miter cut.
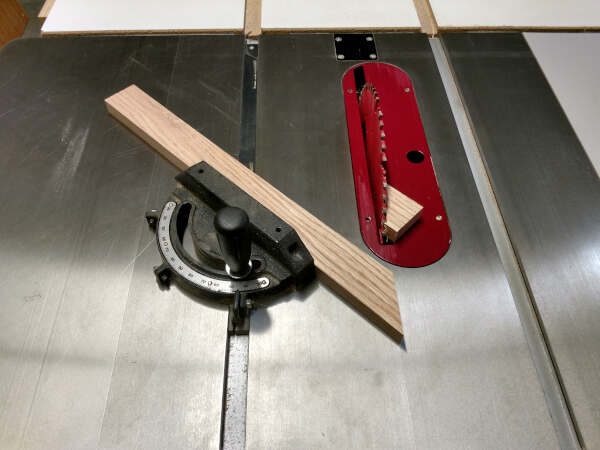
Now set board on your work bench or table saw.
Set the reference angle of your digital level to the same surface.
Now put the level on the cut surface of the scrap board to measure the angle.
Here I’m only 0.07 degrees off, that’s pretty good!
If it’s not close enough for your liking, adjust the miter gauge a bit to correct.
Keep cutting on this scrap board until you get the angle just right, then you can make your final cuts on the project.
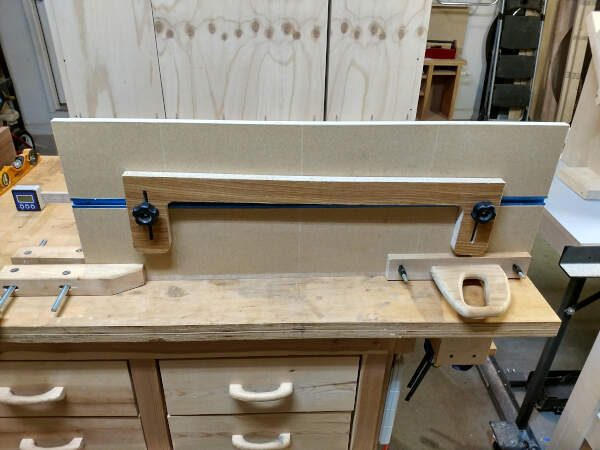
5 – Great for Creating Your Miter Sled
I’ve got a miter sled project you can check out here.
I made that sled (and that article) before I bought my digital level. Now I wish I had bought it before, it would’ve been helpful.
So the key part of that project is not necessarily making the fences a perfect 45 degrees to the blade, but instead you must make the fences a perfect 90 degrees to each other.
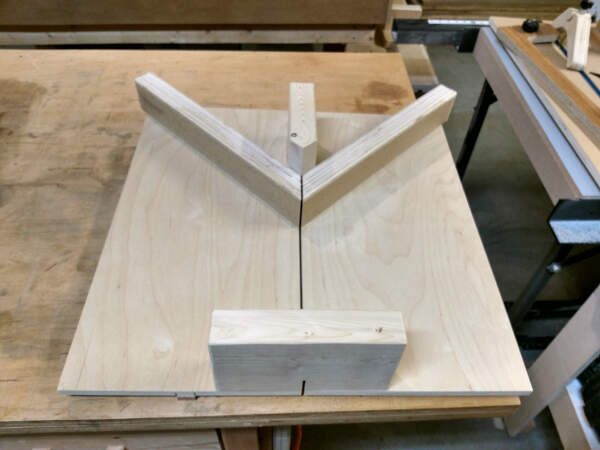
So what you can do there is, after you’ve already attached the first fence (which is all explained in the article I linked to above), is to rest the sled off the side of your work bench.
You want the attached fence to be resting on the bench:
NOTE – If you use this method to build this sled, you’ll probably want to clamp the sled in place. You’ll be holding the other fence in your hand while lining it up as I’m about to explain.
Then set your reference angle to the bench, and now hold it against your other fence while lining it up on the sled.
Once your level shows 90 degrees, clamp that fence in place and secure it to the sled with screws.
As you can see, my method from the original article (using a framing square to set the 90 degree fence up) resulted in this sled being off just a bit.
Where it’s supposed to be 90 degrees, it’s instead 89.8 degrees.
I believe that’s close enough, and so far I haven’t noticed any of my miter cuts being off. So 0.2 degrees may be alright, at least for small projects.
But had I used this tool when building this miter sled, you can bet I would’ve gotten this angle perfect!
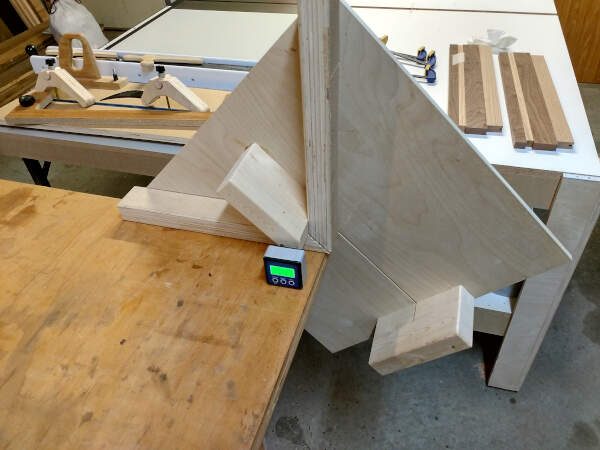
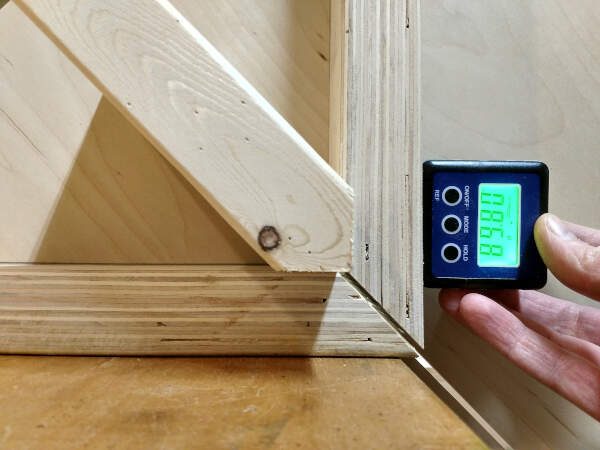
6 – Using A Tapering Sled
If I need to cut a taper at a specific angle on the table saw, I’ll use the straight-edge / joiner-sled / taper-sled I made, which has a tapering fence built in.
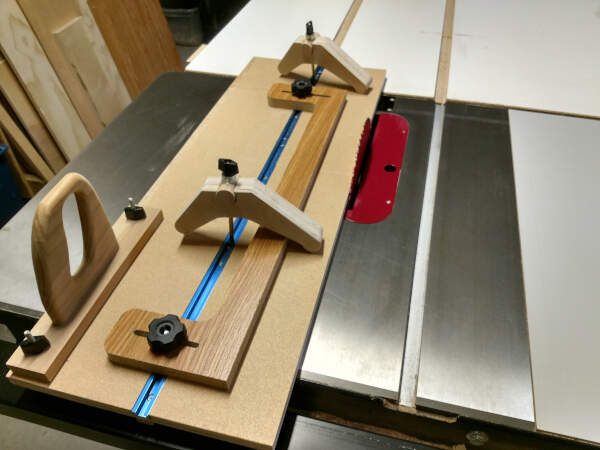
With the sled standing on the edge with the cutting side facing up, I’ll set the reference angle to the cutting edge of the sled base (not the work bench).
NOTE – when setting the reference surface on this tool, if it’s on something that moves a little when you push the REF button, it’s hard to get it perfectly zero’d. As you can see above, I was only able to get it to zero in at 0.02 degrees. But that’s good enough.
Then I can set the level on the taper fence and adjust it until the angle’s right.
Here I was able to get the fence tightened down at nearly a perfect 7 degrees (6.99).
This works great for example when building my table saw dovetailing jig where you need to cut several pieces at a specific angle.
Guys that’s all I’ve discovered so far, but I’m sure there are more cool tricks for this neat little tool.
Let me know in the comments below if you’ve got anything to add to this list so everyone reading can benefit.