How to Cut Acrylic Sheets Like a Pro – SendCutSend
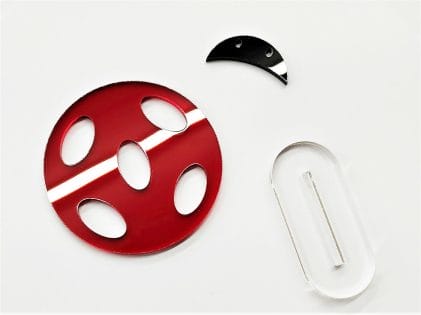
Acrylic sheets (or plexiglass as it’s sometimes called) come in a variety of sizes and an unbelievable number of colors including clear. Clear acrylic is both clearer than glass and about 10 times more resistant to impacts than glass. The fact that it can be strong and beautiful at the same time make it a great material for professionals and DIYers both to utilize it in all sorts of projects from decorative pieces and displays, to protective covers and panels. Acrylic panels can be used to enclose a 3D printer or make an edge lit sign.
In this article we’re going to give you some tips for cutting acrylic. Even though lasers are awesome, we know not everyone has access to them, so we’ll cover multiple ways to cut acrylic sheets.
Laser Cutting Acrylic
Let’s start with laser cutting. Cutting acrylic with a laser offers some advantages over other methods of cutting. Since a laser uses heat to melt and vaporize a thin line of material it doesn’t stress the acrylic which could cause it to crack or chip. Laser movements are also controlled by a computer, which means complex shapes and sweeping curves can be cut smoothly with ease.
When it comes to lasers, there are a few common varieties. CO2 lasers are the best choice for cutting acrylic since they can cut any color, that’s what we use. Diode lasers can cut acrylic, but can struggle with the clear and lighter colors. One of the highlights of acrylic is the number of colors available, from solids to transparent.
5 Other Ways for Cutting Acrylic
Now that we’ve gotten the laser talk out of our system, let’s look at some other ways you can cut acrylic sheets. Even though it can look like glass, acrylic is much easier to cut with a variety of common tools. Acrylic can be cut with a lot of woodworking tools. If you don’t remember anything else from this article, remember these two key points when cutting acrylic manually:
- Avoid creating too much heat while you cut. Tools that generate heat tend to melt the acrylic rather than cutting it cleanly. Melted acrylic looks more like lumpy slime than the clean polished sheet it was.
- Avoid unnecessary bending while you cut. Acrylic doesn’t like to be bent, it can crack. Using aggressive tools or not supporting the material as you cut can bend it and that can cause unwanted breakage.
Most of the tips we’re going to provide here can boil down into one of those two categories. Let’s get into some details.
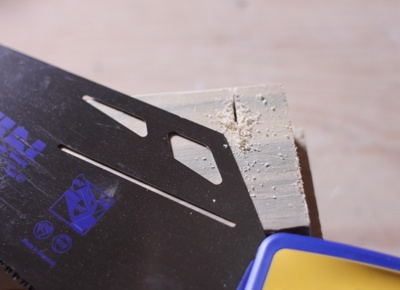
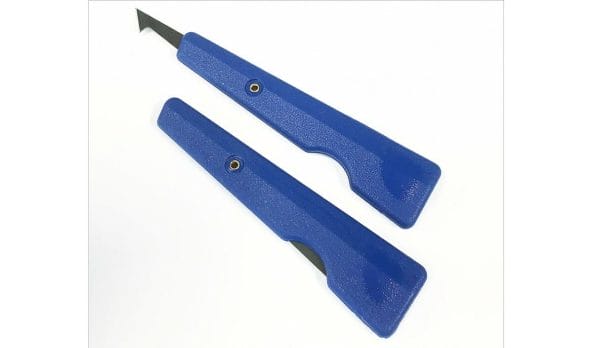
Scoring Knife
Similar to the way you would cut glass, acrylic can be scored with a sharp blade, and then broken along the score line. This works best for straight lines, although it is possible to score a gentle curve, but that’s much more challenging. If scoring is your cutting method of choice, here are some tips for the best results:
- Wear gloves and safety glasses. Breaking acrylic, even a controlled break along a scored line, can leave sharp edges and you never know if a loose shard might break free. This is true no matter which method you use to cut your acrylic sheets.
- Practice on some scrap pieces before you attempt the real thing.
- You’ll get the best results if you use a straight edge to guide your scoring tool.
- Speaking of scoring tools, you can use a special scoring blade, but nearly any blade can work as long as it’s sharp. You can even use a utility knife.
- Keep the material supported underneath your cut on a flat surface, don’t try to score a line that’s hanging off the edge of a table.
- When you score, you want to keep constant pressure so the score is clean and even. Don’t try to cut too deep, you don’t need to cut all the way through, just through the top surface of the material. This is where practicing on scrap can help you to get a feel for how deep you need to score and how much pressure that requires. You can take multiple passes as long each pass is in the same groove. Don’t let it slip out or you’ll have multiple score marks and the final break may be more jagged than you want.
- You’ll have best results if your line is straight and goes completely from one edge of the material to the other.
- Once you’ve got your scored line, the next step is to break it along the line. You can do this by placing the material along the edge of a table or workbench. The score line should be right on the edge. Firmly hold or clamp the material to the table while applying even pressure to the material hanging over the edge as if you’re trying to bend it at the score line. The material should snap along the score line.
- This can leave a rough and sometimes jagged edge along the cut, so you may want to finish it off with some sandpaper. More on finishing cut edges later.
Jigsaw or Coping Saw

We’ve lumped jigsaws and coping saws together here. Both saws have the advantage of being able to cut curves, something the scoring method isn’t good at.
- Prepare your acrylic sheet by masking the surface near the cut. Acrylic scratches easier than glass, so pushing a saw across it can leave marks. Most acrylic comes with a protective paper on both sides, you can leave that on while you cut. If you’re cutting a piece that’s already had that paper removed, masking tape works great also. Acrylic cut by SendCutSend will ship with the protective film still in place.
- Mark your cut line on the masking or acrylic itself. Permanent marker or dry erase markers work well on acrylic.
- Use a sharp fine pitch blade, usually a metal cutting blade can work well, but there are special blades made for cutting acrylics. Avoid aggressive blades with fewer teeth per inch, like those for rough wood cutting. Those types of blades will apply more bending pressure as they cut and can cause chipping instead of clean cuts.
- Support the material well as you cut. Cutting with too much material unsupported may cause the material to bounce up and down with the blade and that can cause cracking.
- Cut slowly to avoid generating a lot of heat. Usually not an issue with a hand coping saw, but with a jigsaw if you have adjustable speed, turn it down. Excess heat can cause melting around your cut, and sometimes even allow the acrylic to weld itself back together. Water or alcohol can be used as coolant. This can both lubricate and cool the cut, allowing you to go faster without generating heat and can leave a smoother finish with fewer saw marks.
- If your jigsaw has an orbital feature that can be adjusted, turn that down or off so the blade is just moving up and down.
- After your cut, you’ll probably be left with an edge that shows some saw marks. You can smooth these out if you want with some sandpaper.
Bandsaw
A bandsaw has similar advantages to a jigsaw, but less portable. Similar tips apply here.
- Mask the surface that will be sliding against the saws table to avoid scratches.
- Use a fine pitch blade, again blades for thin metal usually work well.
- Keep the blade speed slow to avoid heat, or use something as a coolant during the cut. Sometimes just having a stream of compressed air blowing on the cut can help reduce the heat.
- Clean up cut edges with sandpaper if they’re not smooth enough for your project.
Table saw

With a table saw you’re back to being limited to straight line cuts, but thanks to the fence, the cuts can be very straight. A table saw is a great way to break larger sheets down into smaller sheets. Similar tips apply as above, so we won’t cover those again. A circular saw is similar and can be used with a straightedge to get nice straight cuts.
- One tip that can help with table saw cutting is to sandwich your acrylic between two pieces of sacrificial material. Plywood or mdf work great. It doesn’t need to be very thick, it just needs to support the material on both sides as the blade both enters and exits the acrylic. This can help prevent the saw blade from chipping the material, as even a small gap between blade and support can be enough to notice a rougher cut. A zero clearance insert on your saw works great also.
- You can buy table saw blades specifically for acrylic and plastics. Those are good choices since fine tooth metal cutting blades aren’t very common for table saws. A very fine wood finishing blade can work also. Just avoid blades for rough cutting or ripping.
Tips on How to Cut Acrylic Sheet Without Break or Cracking
We’ve covered tips for specific tools, but let’s review some general tips that are useful no matter which tool you choose.
- Keep the cut cool. Don’t cut too fast (or too slow with a dull blade). A small bottle of water or alcohol can provide coolant and lubrication.
- Support the material well as you work it. Don’t let it bend more than you have to.
- Choose the right blade. Avoid aggressive fast cutting blades.
- Keep the surface covered until you’re finished. This can mean leaving the factory film in place or applying some masking tape while you work with it. When you do finally pull the masking off you get the satisfaction of seeing that pristine surface for the first time. We will leave the film on any acrylic parts you order from us.
- We didn’t specifically cover drilling holes in acrylic, but the same rules apply. Since acrylic is a softer material (compared to metals) drill bits with a sharper cutting angle will work better.
Finishing Your Acrylic Cut Parts
One thing all these cutting methods have in common is they can leave the cut edges looking duller or rougher than the perfectly shiny faces. Depending on the project, that may be ok or even desirable, but you’re not necessarily stuck with it. If you decide you want to smooth out the edges, sandpaper is a great way to do it. Similar tips apply to sanding edges as cutting. Avoid too much heat and avoid bending.
Use a quality sandpaper
Starting with around 120 grit sandpaper and work your way up. You may be able to start with a higher grit sandpaper if your cut came out relatively smooth already. You shouldn’t need a rougher grit than 120, acrylic sands pretty easily. If you go with a power sander instead of hand sanding, keep it moving. Don’t stay in one spot too long or you can generate enough heat to melt the acrylic. Power tools are faster, but that can mean you get into trouble before you realize it.
Sand until all saw marks are gone
You want to sand enough with the first grit that all the saw marks are gone and you’re left with a consistently flat scratched surface. Once the entire edge is evenly scratched, move up to the next finest grit. Stick with each grit until the scratches from the previous grit are gone and the edge shows consistent finer scratches, then it’s time to move up in grit again.
Move onto polishing and buffing
Sanding, even up to grits in the several thousands, can leave you with a smooth satin finish, but if you’re after a polished glossy edge that matches the face you’ll want to polish. Polishing is similar to sanding, you’ll start with coarser grits and work your way finer. You may be satisfied with the finish from one grit of polishing, or you may want to put in some extra effort to get that deep glossy look. Automotive polishing compound works great on acrylic, just follow the same tips above.
A Word from the Experts + Safety Recommendations
Gloves and glasses are a good idea to protect yourself as you cut any material, acrylic is no exception. As we mentioned above, if you only remember two things after reading this article, it should be to avoid excess heat and bending to get the best DIY cuts. Unless your goal is to bend your acrylic sheet, then the answer is apply heat and bend, but that’s for another article. When cutting acrylic at home, you have a range of options depending on your tools. If you decide you’d rather not cut your own acrylic, SendCutSend is ready to cut your designs from acrylic or any other materials. Check out our page on acrylic for all the colors and thicknesses we can cut for your project.